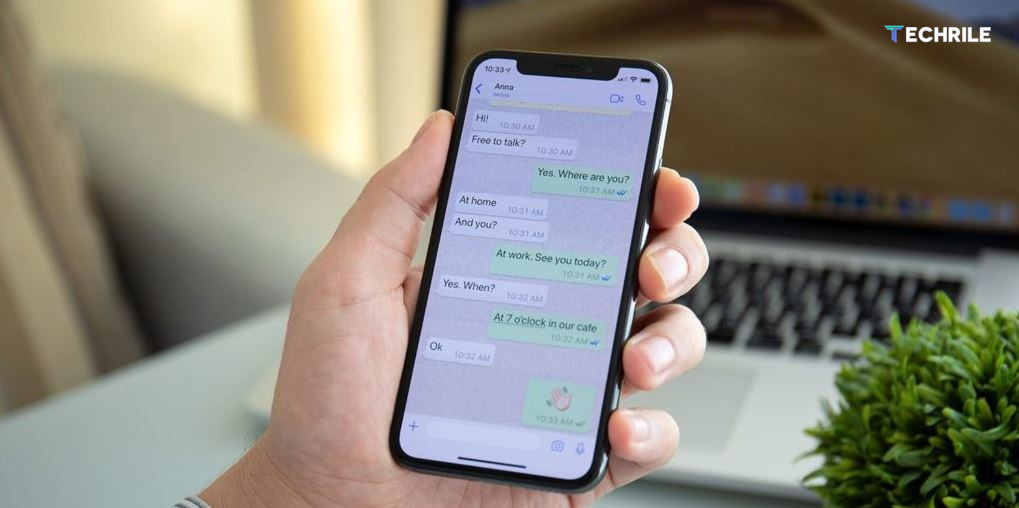
WhatsApp is the top messaging service around the world. However, it still lacks some basic functions that many users could benefit from daily. One of these functions is the ability to schedule messages on WhatsApp. Although this feature does not exist within the app, it can be achieved through alternative methods.
If you are using an iPhone, there is a very simple way to schedule WhatsApp messages. To do this, we will use the Shortcuts app that comes pre-installed on the device, which offers thousands of possibilities. Although it is one of the least used apps daily, it is likely the most useful and versatile of all.
While it may seem complicated, it is actually quite easy. Using the Shortcuts app is straightforward once you know what you’re looking for—in this case, scheduling WhatsApp messages. Once you have everything set up, you can plan all the messages you need to send for the day, even if you will be busy later on.
How to Schedule WhatsApp Messages on an iPhone
The process is quick and easy, so you’ll be ready to go in just a couple of steps. Just make sure to follow the step-by-step guide to set up your iPhone shortcut correctly and schedule WhatsApp messages.
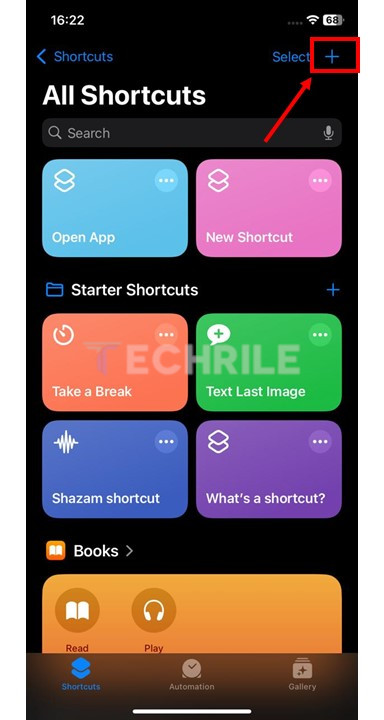
- Open the Shortcuts app on your iPhone.
- Tap the “+” button located at the top right of the screen.
- You will see a new menu from which you can create different shortcuts. Tap on Add Action.
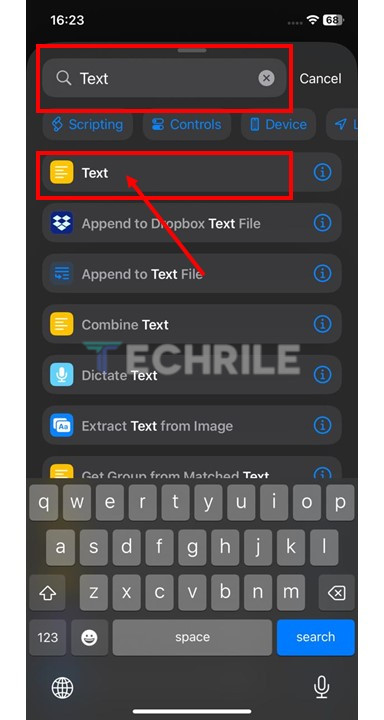
- In the search bar above, type Text and select it from the list.
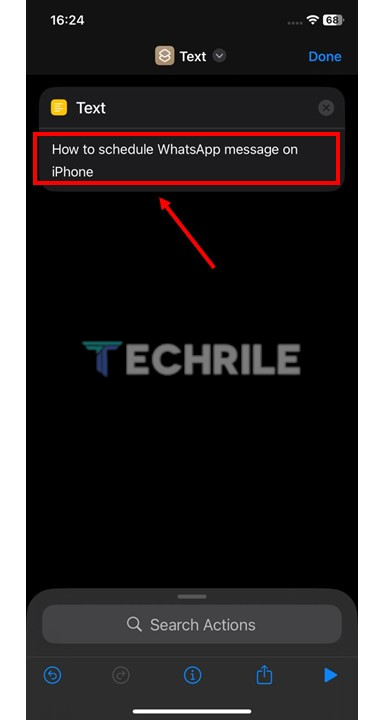
- Now, type the message you want to send to your contact.
- Tap the bottom bar again and type WhatsApp. Then, select Send Message to and choose your preferred contact.
- Tap OK at the top right.
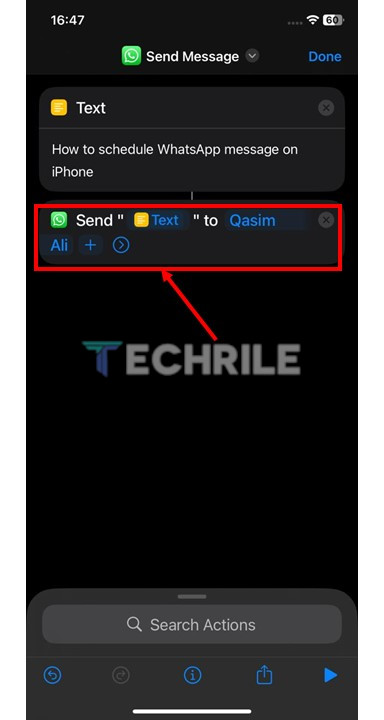
Now, follow these steps to finish scheduling your WhatsApp messages:
- Tap the Automation tab on the bottom bar.
- Select New Automation and then Time of Day.
- Choose the time you want the scheduled WhatsApp message to be sent.
- Tap Next, and in the new menu, look for the shortcut you just created. In my case, it’s called Send Message.
- You will see the generated automation. Tap on it and select Run Immediately. You can disable the Notify When Running option.
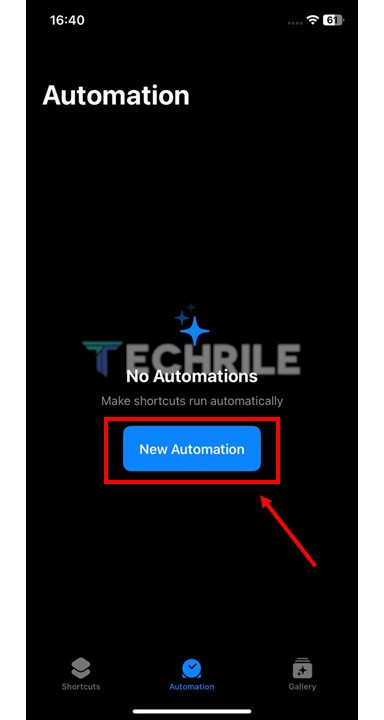
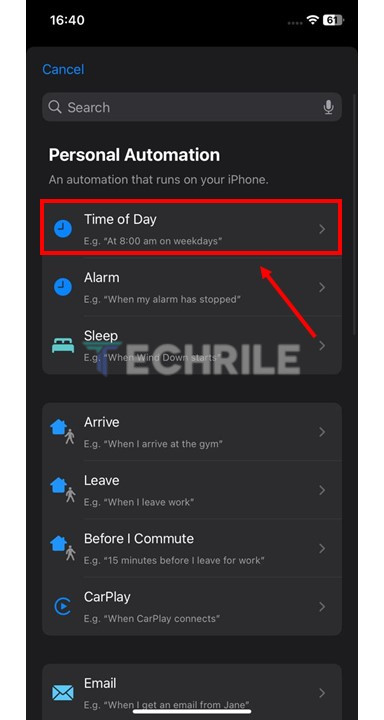
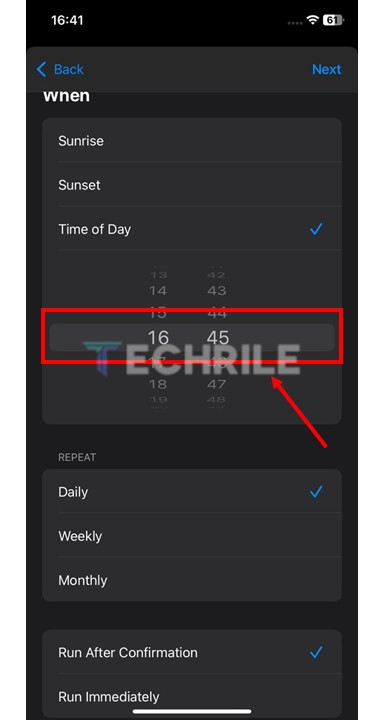
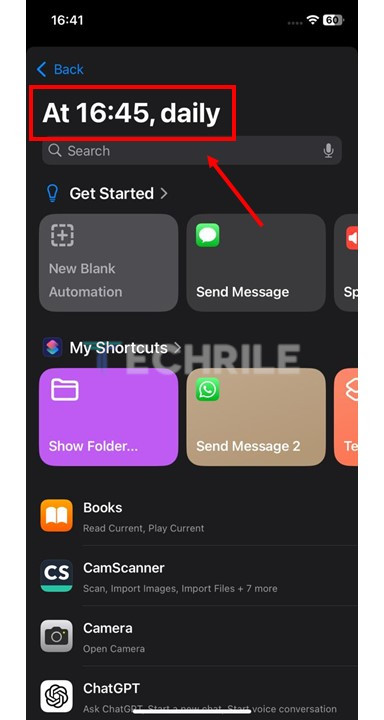
Once this is done, the automation for scheduling WhatsApp messages will be ready. The countdown will then start to send the message to your recipient. It’s important to note that you don’t need to repeat this entire process every time. From now on, you will only need to edit the Text, Contact, and Time fields. The rest will be handled automatically.

